You have control over your own notifications and these can be used to suit your workflow and personal preferences from your user profile.
The default notification is an on-screen pop-up when participants enter the room. You need to be in the waiting queue, or click the notification bell, to receive these.
You can customise your room notifications and availability settings from your user profile. You can select from different types of notifications and multiple modes of delivery. Follow these steps to learn where to access notifications and how to customise your notifications.
Accessing notifications
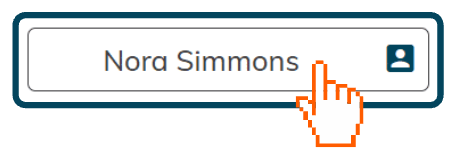
Click on your name to access your User Profile.
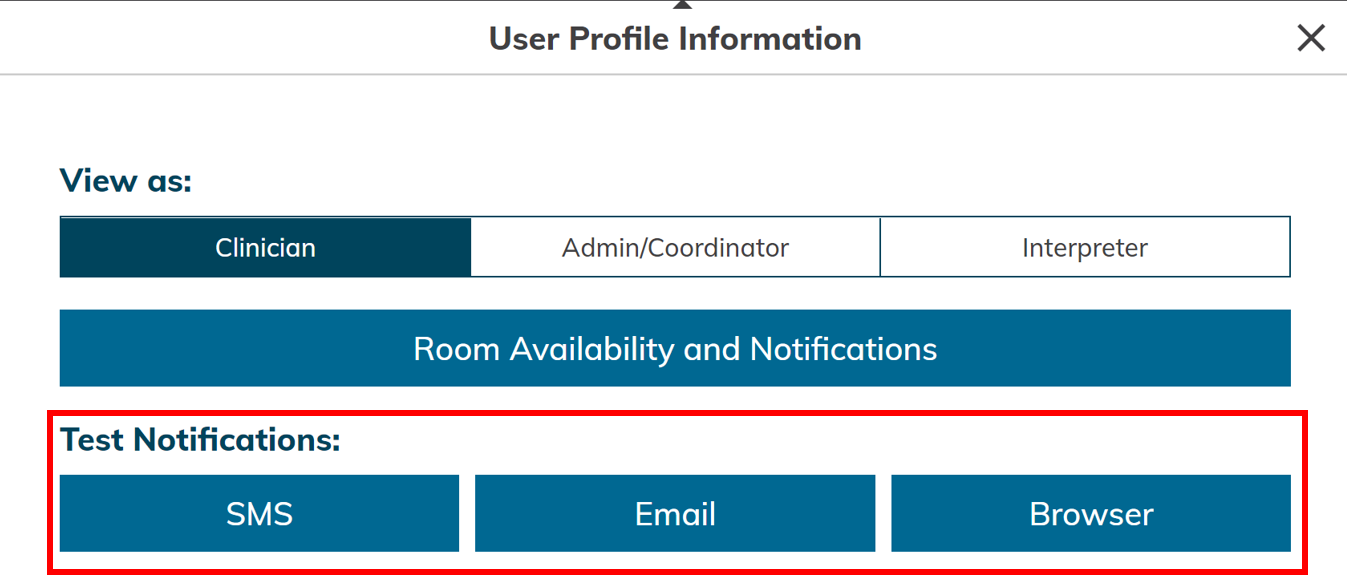
Select Room Availability and Notifications.
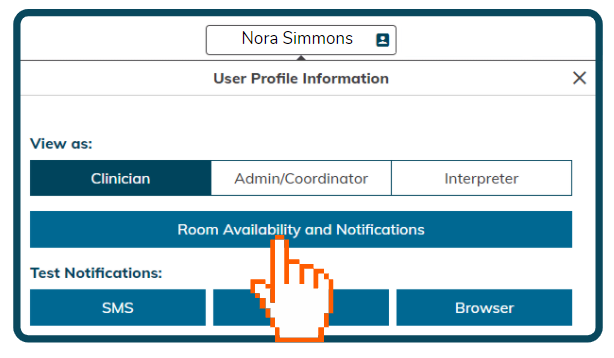
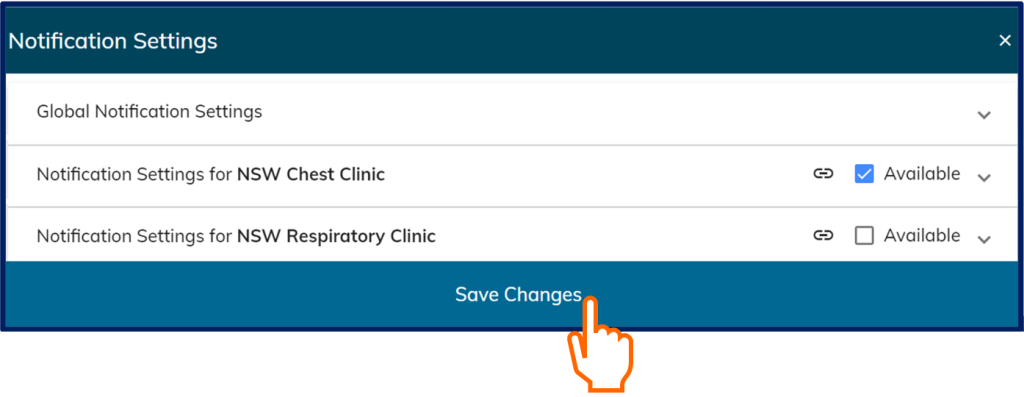
The rooms that you are a member of will open in a list.
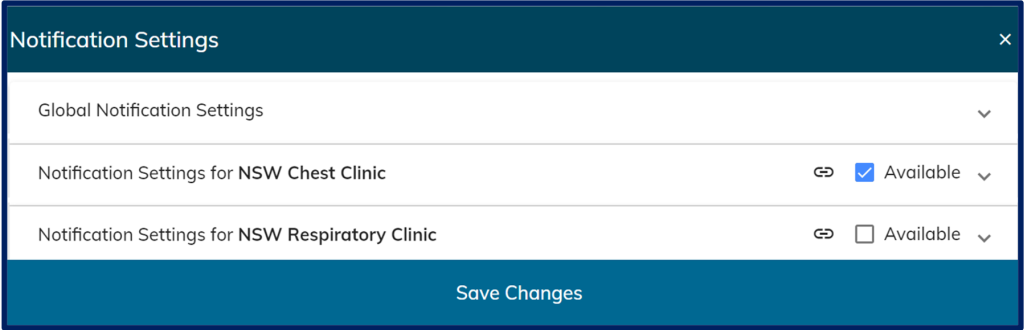
Accessing room notification settings
To access your room notification settings, click on the arrow pointing down.

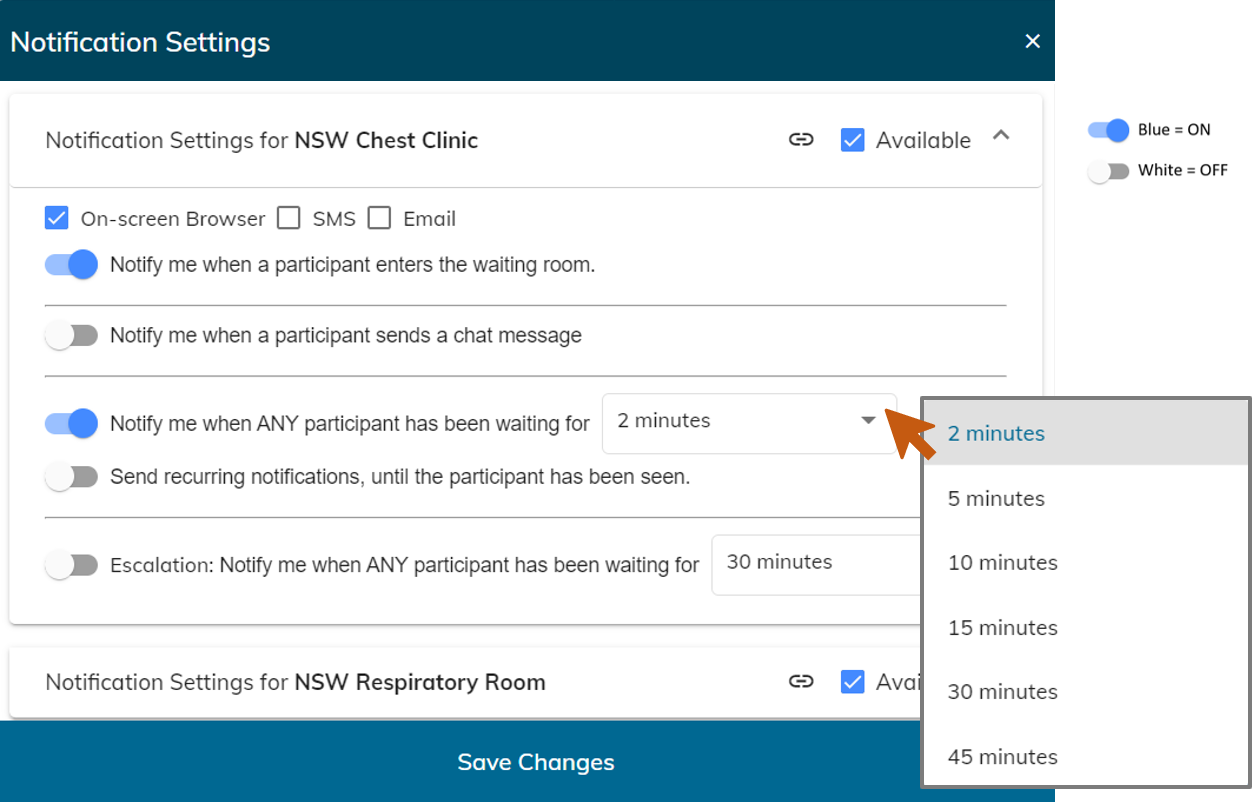
Selecting modes of delivery
You can select three different modes to receive notifications:
- On-screen Browser
- SMS
- Email.
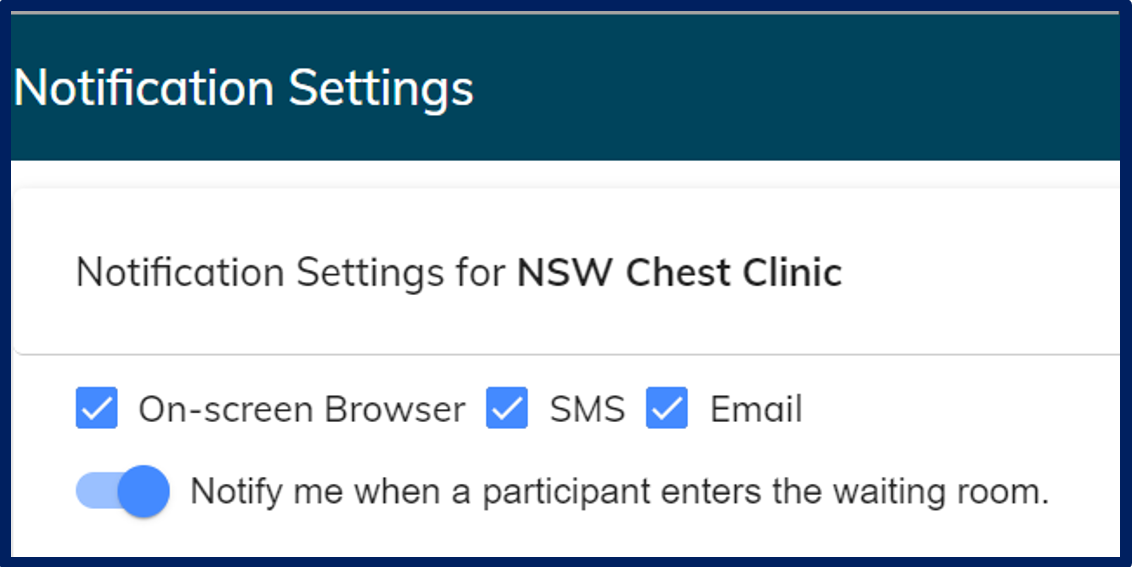
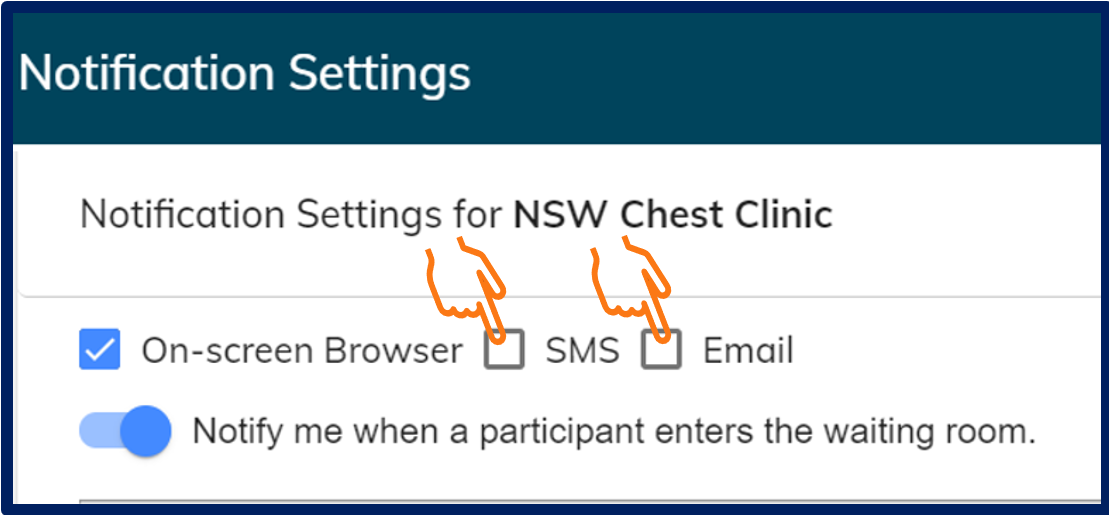
The mode of delivery is selected by ticking the relevant mode. You can select more than one if desired. Ensure that you have pre-filled the correct phone number and email in your user profile to ensure notifications are received.
The SMS button will be greyed out and cannot be selected if there is no mobile number saved in your user profile.
You can test each delivery mode in your user profile.
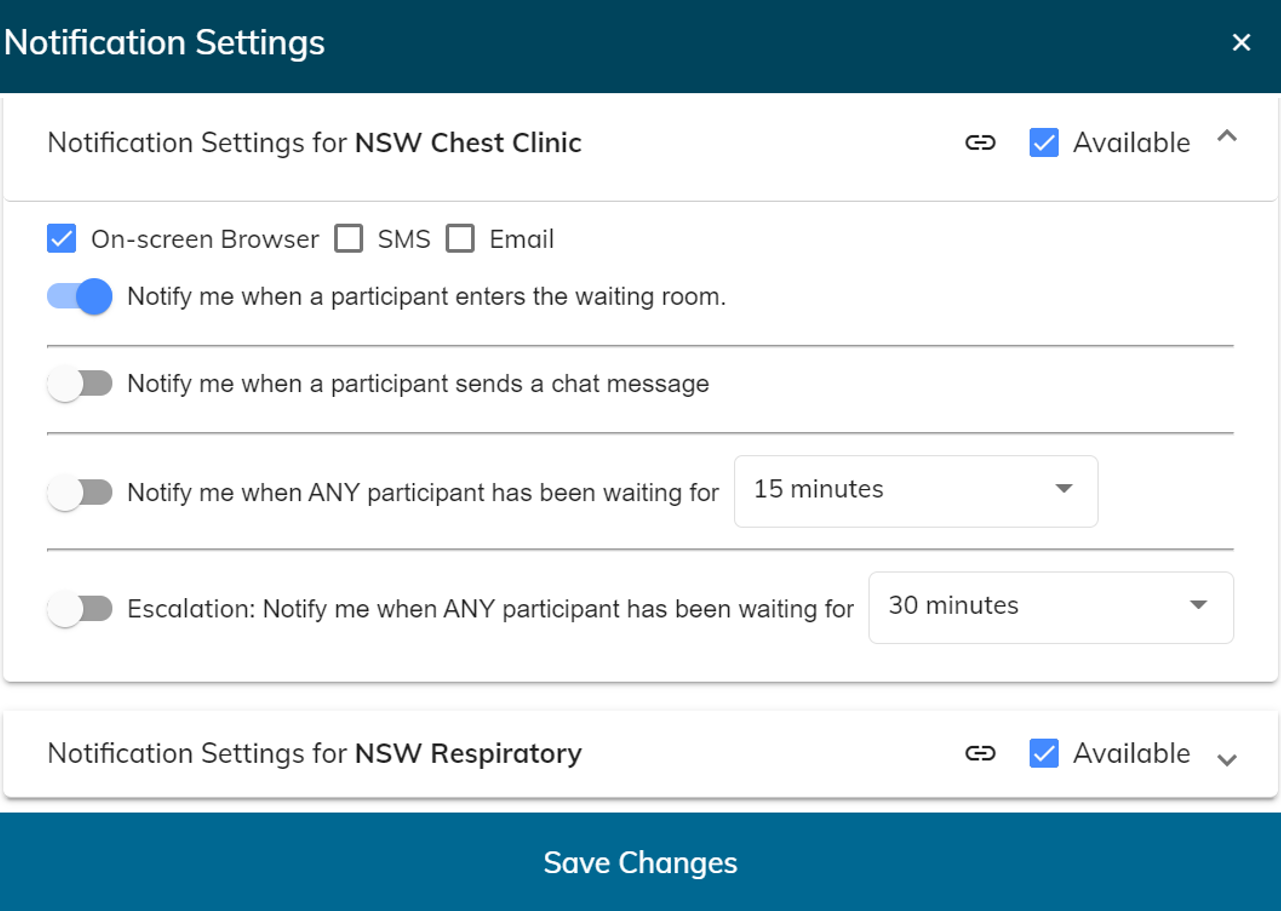
There are four types of notifications to select from.
- Notify me when a participant enters the waiting room.
- Notify me when a participant sends a chat message.
- Notify me when a participant has been waiting for __ minutes. If required, this notification can be enabled to recur at the various time intervals.
- Escalation: Notify me when a participant has been waiting for __ minutes.
Note: if you have a recurring notification, the escalation notification becomes redundant.
Save changes
Make sure you select Save Changes after you have customised your notification settings or you will have to repeat the change.
Global notification settings
You can set your notifications at a room level or at a global level.
Global notification is accessed through the Room Availability and Notifications button within your user profile.
Global notification allows you to enable, or disable notifications, and to set an escalation alert for all your rooms.
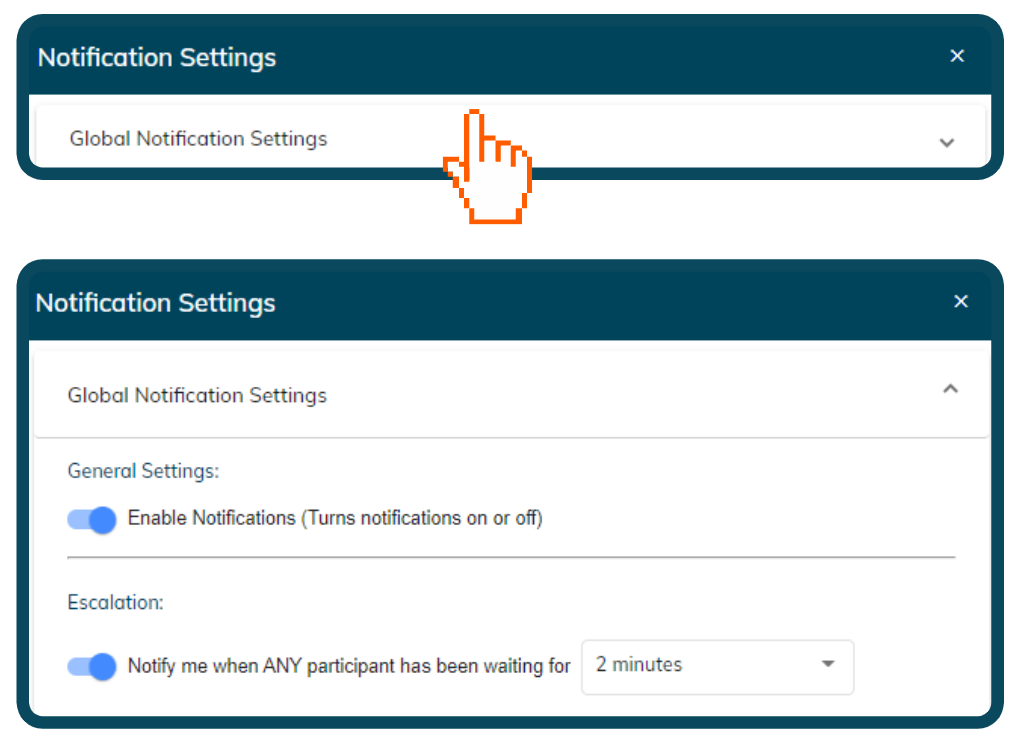
Global escalation notifications will be sent even when General Notification Settings are disabled.
Note: When an individual room escalation notification is activated, it will override the global escalation notification setting.
Room settings and notifications
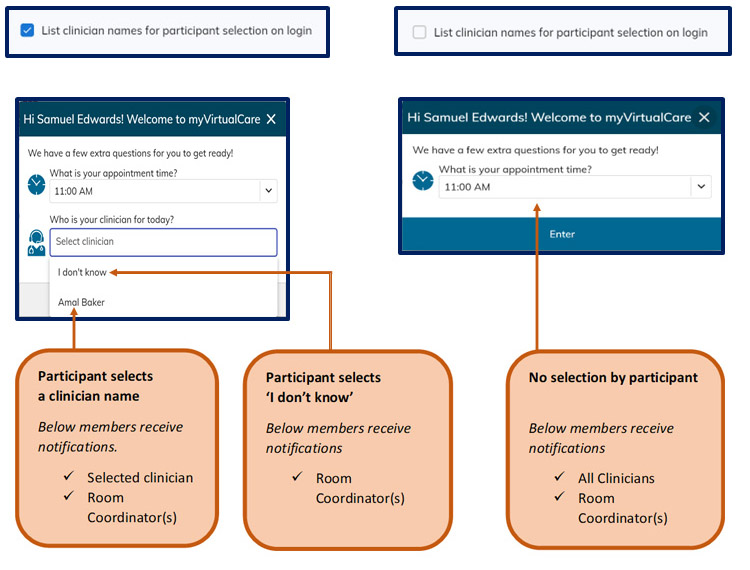
The room setting determines who will receive notifications. Room settings are managed by administrators and coordinators who can enable or disable the List clinician names for participant selection on login function.
When this feature is enabled, the selection made by the participant determines who in the room receives notifications. When the selection feature is disabled, notifications are sent to all clinicians and coordinators in that room.