Module 3 - Hands-on assessment
Aim
This module aims to provide clinicians with instructions and practical tips for hands-on client examination as part of a seating and wheeled mobility assessment. It includes instructions on implementing the mechanical assessment tool (MAT), skin checks and a sitting balance assessment.
Rationale
A hands-on assessment is needed to explore, verify and quantify any issues reported by the client or which have become apparent in the course of a thorough initial interview. With an understanding of the relevant medical, psychosocial, functional and environmental needs of the client, a hands-on assessment can confirm the scope of potential interventions with regard to the presentation of the client’s body. Primary elements of the hands-on assessment include the MAT, a skin check, and an assessment of sitting balance.
The MAT is used to:
- Evaluate the flexibility of the client's body and assess flexible or fixed deformities in the supine position
- Assess potential and practical interventions for improving posture and pressure management through simulation in the sitting position
- Investigate the influence of tone and spasm on posture and positioning
- Assess functional and dynamic sitting balance to determine whether postural support is required (functional capability may be affected by postural supports and should also be considered)
- Provide clear records to set seating goals in the set-up of the trial and final seating systems
- Provide clinical reasoning for proposed seating intervention in documentation or reports.
If there is a history of skin breakdown, a skin check should be conducted to assess the client’s current skin integrity and to assist in developing strategies to reduce the risk of the occurrence of future pressure injuries. This will be covered in greater depth as a part of the investigation of pressure management in seating and wheeled mobility, refer to Module 8.
Outcomes
At the end of this module, you will be able to:
- Describe the basic anatomy and bony landmarks of the pelvis and spine
- Understand the rationale for and process of implementing the MAT
- Describe postural abnormalities
- Categorise sitting balance in relation to the level of spinal cord injury
- Know the purpose and process of a skin check
- Apply information obtained from hands-on assessment to establish postural goals
- The mechanical assessment tool (MAT)
- Clinical knowledge required to conduct a MAT
- Level of injury, sitting balance and seating
- Conducting the MAT
- Assessment in existing seating system
- Assessment in supine
- Assessment in sitting
- Case study
- Recording the MAT
- Interpreting the MAT
- Skin checks
- Common presentations and possible causes due to support surfaces
- Key concepts in this module
- Quiz for Module 3
In this module
- The mechanical assessment tool (MAT)
- Clinical knowledge required to conduct a MAT
- Level of injury, sitting balance and seating
- Conducting the MAT
- Assessment in existing seating system
- Assessment in supine
- Assessment in sitting
- Case study
- Recording the MAT
- Interpreting the MAT
- Skin checks
- Common presentations and possible causes due to support surfaces
- Key concepts in this module
- Quiz for Module 3
The mechanical assessment tool (MAT)
The MAT is commonly used by seating clinicians as part of the seating assessment process. It may also be referred to as a biomechanical assessment and physical evaluation.
The MAT is a musculoskeletal examination of the client's:
- Range of motion
- Joint flexibility
- Muscle length, and
- Skeletal alignment.
It usually involves postural assessment of the person in their existing seating system, in supine, and sitting on a firm surface. Neurological issues such as tone and spasm pattern should be noted as they affect posture and muscle length.
Limited muscle length or joint flexibility can restrict the client’s seated posture. Functional capacities such as arm reach to the controls, or propulsion of a manual wheelchair may also be affected.
Tone and spasm may become evident whilst conducting the MAT. An assessment task may be halted during an intense spasm and can be resumed when it subsides. Spasm can be triggered by internal stimuli such as urinary tract infection or blocked catheter, or external stimuli such as rough terrain or a change in backrest angle. Unsupported posture during spasm may place the client at risk of falls or lead to the development of postural deformities.
The MAT process facilitates the selection of a seating system with appropriate ‘size’ and ‘shape’ for the client. This is done with respect to the client's requirement for functional capacity, posture and pressure management.
Clinical knowledge required to conduct a MAT
In order to conduct a MAT a therapist will need to be able to:
- Locate bony landmarks of the pelvis
- Understand the structure of the client’s skeleton and the influence of the various muscle groups on the articulation of the joints.
- Understand body planes and ranges of movement to identify fixed vs. flexible deformities.
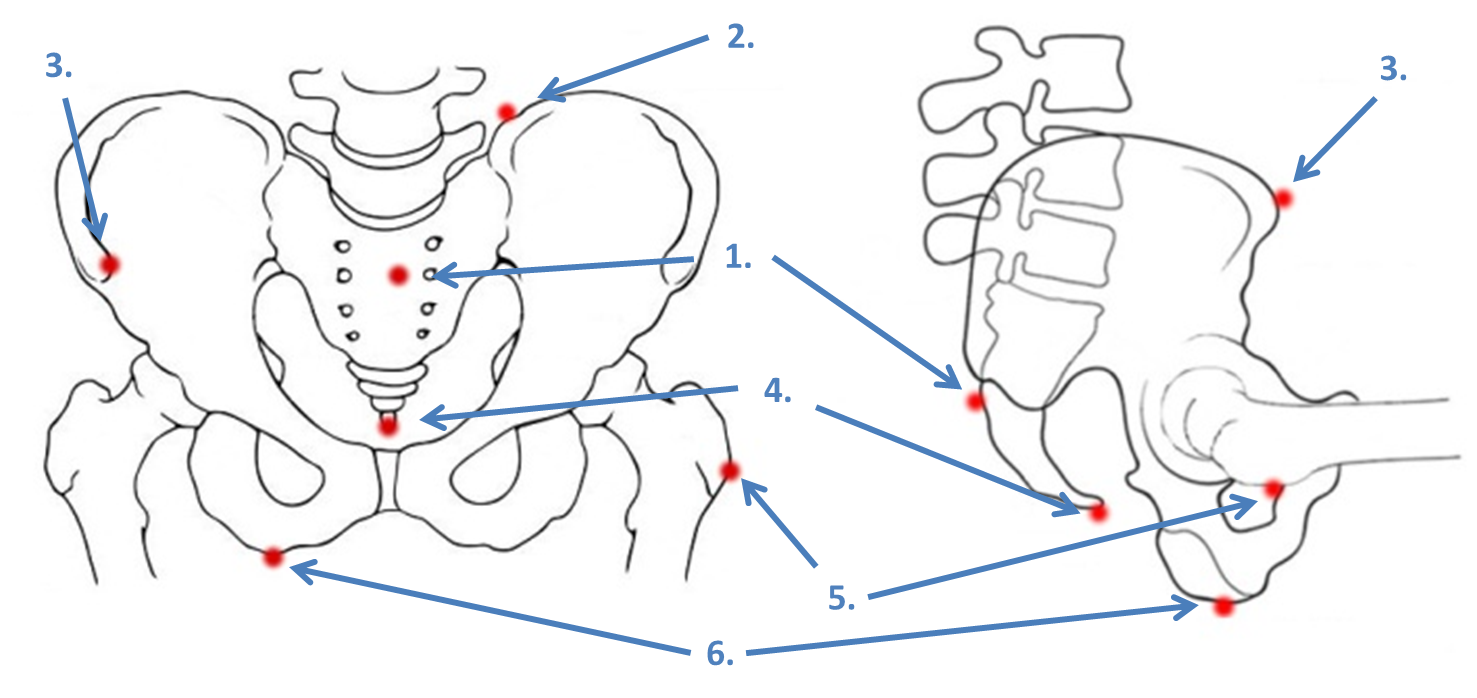
Bony landmarks of the pelvis
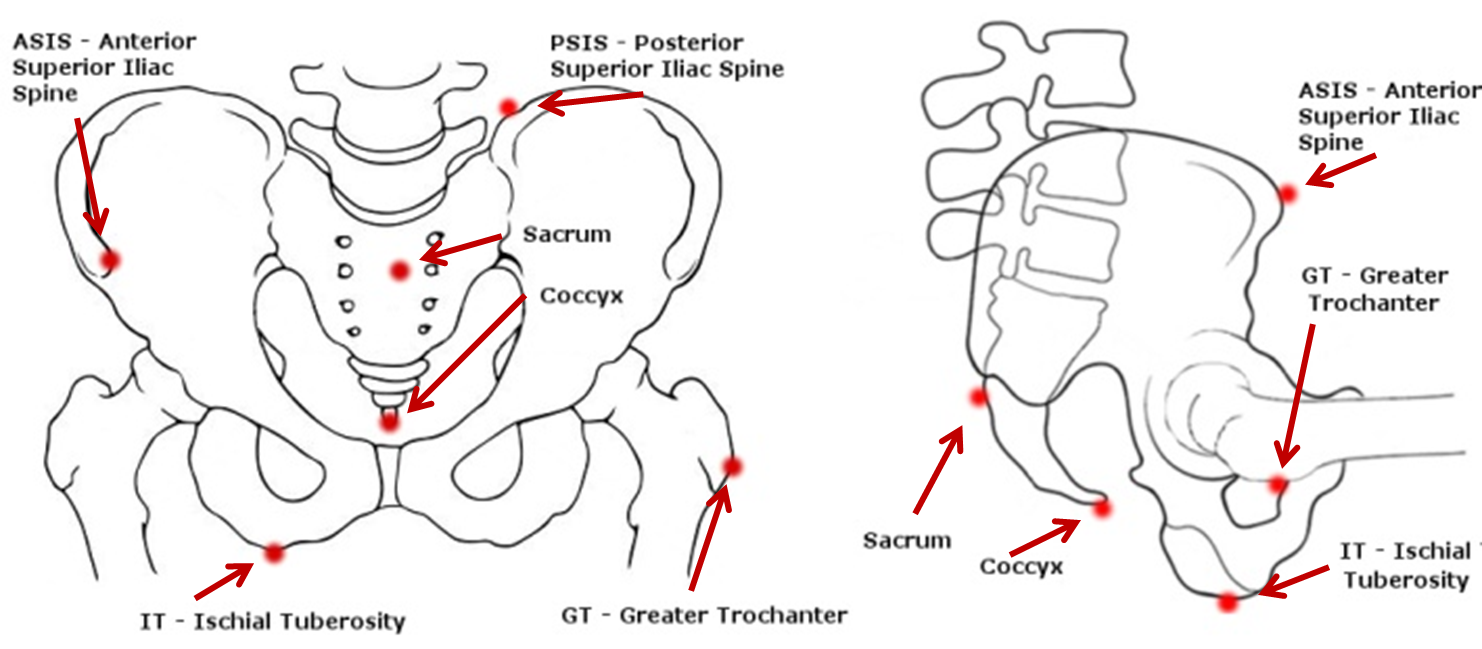
Figure 1: Bony landmarks of the pelvis.
Level of injury, sitting balance and seating
Clients with a spinal cord injury may require seating support due to reduced or absent nerve innervation to the abdominal-thoracic muscles that provide intrinsic postural support for independent sitting. Other factors, such as "completeness/ incompleteness" of the SCI, upper extremity injury, co-morbidities and orthopaedic complications can also influence balancing tasks.
A general guide to seating balance for clients with a complete spinal cord injury
Low thoracic-level T9-T12 and lumbar/sacral-level injuries
Hands-free sitters can sit without using their hands for support and can change their sitting posture.
- The seating system may include a low backrest/posterior support, contoured cushion, customised backrest and seat angles of the manual wheelchair optimised for pelvic stability and skeletal alignment, and for efficient and comfortable propulsion
- Assessment of sitting balance skills should also cover the use of manual wheelchairs in propulsion and in reaching tasks.
High thoracic-level T1-T8 injuries and lower cervical-level C5-C8
Hands-dependentsitters need at least one upper extremity for support or otherwise adopt a ‘C-sitting’ posture to compensate for balance when both arms are lifted simultaneously.
- The seating system may include posterior and lateral postural support while maintaining neutral lordosis and kyphosis position
- The assessment of static posture and dynamic balance varies greatly with the level of spinal cord injury. Consider physiotherapist assessment/reports, activity level, time since injury and appropriate functional task such as feeding (hand to mouth movement), emptying catheters, reaching task, transfer and wheeled propulsion (refer to the initial interview form, see Module 2). This approach will contribute to determining whether the seating system can be configured to improve sitting balance, freeing the upper limbs for functional tasks.
High cervical-level C1-C4 injuries
Dependent sitters (also referred to as propped sitters) are unable to support themselves in sitting using the trunk muscles and upper extremities.
- External supports are required for total body support including upper thoracic, armrests (and possibly headrests) to maintain an upright sitting posture
- Most propped sitters use power seating and wheeled mobility systems for independent mobility, postural and pressure care management.
Conducting the MAT
The pelvis is the ‘foundation stone’ in sitting as it supports the person’s body weight above it. Pelvic positioning and stability affect the alignment of the head, trunk, upper and lower extremities. Asymmetrical pelvic alignment may increase risk of pressure injury development, so the pelvis is usually assessed first in the MAT.
The MAT is usually conducted in 3 phases:
Postural assessment in
existing seating system
Assessment
in supine
Assessment
in sitting
Postural assessment in existing seating system
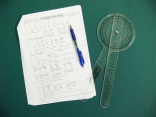 Helpful Equipment:
- Refer to page 1 of the Basic MAT form
- Camera and sticker dots
- Goniometer (pictured right)
Record the client's posture in the current seating and mobility system, including photos. Make sure the client is in their "usual posture". Note how this posture influences pressure distribution, and how the seating system influences the current posture.
The process should include assessment of:
Postural Presentations | Options and Considerations |
|---|---|
Pelvic tilt | Neutral, posterior, or anterior tilt |
Pelvic obliquity | Level, left side or right side lowered and by how much, e.g. right lowered by 25mm (1 inch) |
Pelvic rotation | One ASIS is forward of the other, e.g. left forward rotation by 25mm (1 inch) |
Spinal curves | Flattening or exaggeration of lordosis / kyphosis at the neck, thorax and lumbar areas |
Symmetry in the trunk | The sternum or spinal process are perpendicular to ASIS or PSIS with no lateral deviation/scoliosis, and the shoulders are level |
Trunk rotation | The shoulder and the pelvis are horizontally rotated against each other |
Symmetry in head and neck position | Head position is often driven by visual field alignment |
Upper and lower extremities | Positioned and supported to facilitate neutral alignment of the spine and pelvis |
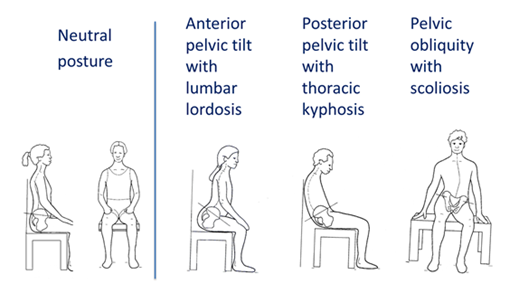
Figure 2: Common postural presentations.
Original image used with permission from Zollar, J.A.1 . Adapted by Turnbull, C. 2016.
Consider functional tasks such as transfer, propulsion and reaching may alter the client’s assessed posture over time. Observing the client propelling a manual wheelchair or driving the power wheelchair outdoor would also be useful as part of the assessment process.
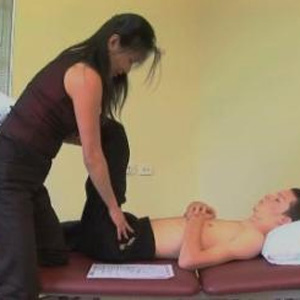
Assessment in supine
Supine assessment provides gravity-eliminated information. It should be conducted on a padded firm surface such as a plinth as it is difficult to assess spinal curves on soft support surfaces, (e.g. bedding) or to manipulate the pelvis and trunk positions when assessing joint flexibility and skeletal alignment.
Joint flexibility can be described as:
- Flexible: the range of motion in the joint is easily manipulated to assume the desired posture/position. Seating intervention aims to promote neutral positioning and prevent deformities.
- Corrects with effort/partially flexible: the range of motion in the joint is manipulated with resistance, but will move towards the neutral position when force is applied.
- Fixed: the joint has restricted range of motion and will not assume a neutral posture. When force is applied to the joint in an effort to achieve a neutral position the neighbouring joints will move instead to compensate.
While the client is lying on a plinth, the following assessments can also be conducted:
- Skin check if relevant
- Body measurement (Module 4) in supine/side-lying if measurement in sitting is not feasible e.g. clients who have sitting-acquired pressure injuries or who are dependent sitters.
- Assessment and measurement of the current system when the client is not sitting in it (Module 5).
Other considerations to note:
- If a plinth is not available, a full length transfer board on a soft bed can be used for a short duration. Remove the client as soon as possible once supine assessment is completed to minimise risk of pressure injury development
- Clients who have open pressure injuries in contact with supine support surface should not be placed on a hard support surface. Supine assessment should only commence after such wounds have healed
- A urinary catheter should be emptied prior to supine assessment. Ensure the catheter tube is not pulled or blocked while performing lower limb flexibility assessment. Monitor the client for signs of autonomic dysreflexia
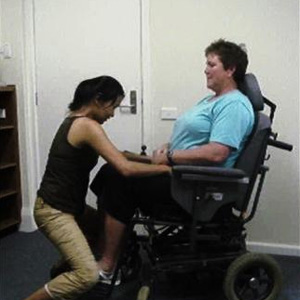
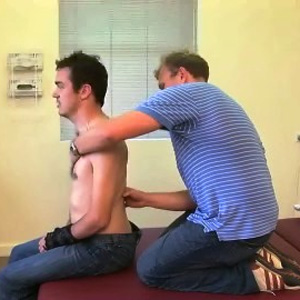
Assessment in sitting
The sitting MAT should be conducted on a padded firm surface such as a plinth or a dining room chair. Feet should be not hanging, but supported on the floor or a foot block
- ‘Hands-free sitters’ and ‘hand-dependent sitters’ should be assessed sitting up with the back of the knees against the edge of a plinth, or sitting fully back in the chair.
- If the client is a dependant sitter, two clinicians may be necessary to manually support the pelvis and trunk for the sitting assessment and simulation task. It is advisable that this assessment task should be conducted by experienced clinicians who work with this group of clientele.
Note
Clients who have sitting-acquired pressure injuries should not sit on a firm surface. Sitting assessment can commence only when the wounds are healed.
The sitting phase of the MAT aims to evaluate the effect of gravity on posture, and trunk flexibility. By comparing joint flexibility recorded in supine assessment, with the posture presentation in sitting assessment, the clinician can then manually manipulate the trunk position and/or place supports under the pelvis to improve skeletal alignment. This is referred as simulation task which forms the basis of seating intervention plan.
Generally, seating intervention should aim to:
- Correct a flexible or semi flexible posture towards neutral position (following the supine MAT recording) and prevent development of postural deformities. Correcting posture requires an applied force to achieve neutral posture; localised pressures created by these applied forces should be monitored. Do not correct beyond the range of motion identified in the supine assessment. Postural correction may be achieved incrementally; adjustment and progressive intervention is advisable.
- Accommodate a fixed deformity identified in the supine phase of the MAT. Seating intervention aims to accommodate fixed deformities and prevent further development. Never simulate beyond the range of motion established in the supine assessment
- At times, medical intervention, surgical and orthotic options, or ‘24-hour positioning’ may be needed for those with postural difficulties such as severe or fixed deformity.

Figure 3: Spectrum of joint flexibility/fixity (See Module 7 for more details)
While the client is sitting on the plinth, other observations and assessments may include:
- An assessment of balance and reach in sitting
- Noting any difficulty in breathing as affected by gravity
- Assessing the influence of head and neck position on vision
- Observation of any spasm or reflex patterns during transfer and in sitting that may affect posture
- Body measurement (Module 4).
Case study
The following case study follows the process of the MAT. Read through the information revealed with each phase of the MAT and consider the implications of each with respect to achieving a good sitting posture. What other considerations are important when thinking about configuring the client’s seating?
A client with a T4 incomplete spinal cord injury was presenting in his wheelchair with recurrent stage 2 pressure injury on his right ischial tuberosity. He was sitting in his 5 year old manual wheelchair and a mildly contoured foam cushion which appeared to be worn out.
Postural assessment sitting in his wheelchair revealed:
- Slight posterior pelvic tilt ( PSIS is lower than ASIS by 25mm (1 inch))
- Pelvic obliquity (right lowered by ~ 50mm (2 inches))
- Hips were position off centred to the left by ~ 25mm (1inch) outside the seat rail (he lost his rigid side guard a few years ago)
- Scoliosis with apex at T8
The supine assessment revealed:
- Neutral pelvic tilt
- Flexible pelvic obliquity – easy to move to left or right side
- No scoliosis visually noted (when clinician levelled his shoulders against the pelvis, the sternum is perpendicular to the shoulders and midline of pelvis)
The sitting assessment revealed:
- Required his arms to push on the plinth for support
- Sat with posterior pelvic tilt, ~ 25mm (1 inch) left obliquity and scoliosis noted
- Also noted that there were asymmetrical tissue bulks between the left and right thigh, with more atrophy noted on the right side
Simulation tasks may include:
- Placing a foam wedge under the left side of the pelvis to check if the pelvic obliquity is correctable and reduces scoliosis
- Providing posterior support with the clinician’s hands behind the client’s PSISs or lumbar spine to reduce posterior pelvic tilt
- Assessing if there is an improvement in posture and balance with adjustment to posterior support
Providing posterior and lateral support by using the clinician’s hands at the apex of the scoliosis if required
References
- Zollars, J.A., (Illus. Knezevich, J.), 1996. Special seating: An illustrated guide. Otto Bock Orthopaedic Indus., Inc., pp71-75.
Recording the MAT
The MAT should be recorded on a form immediately after each assessment phase to prevent confusion. Recording should include postural presentations, the range of movement and flexibility. With the client's consent, take photos for all assessment phases whenever possible. Otherwise, summarising the various phases of the MAT using stick figure drawings may also be useful. See sample (PDF).
Interpreting the MAT
1. Summarise the findings you record at each phase of the MAT.
2. Compare these MAT findings with the medical history taken in the initial interview and recording in the client profile form (Module 2):
In the case study example above, client had reported that his incomplete T4 injury meant that he had some muscular activity on his left side (in his trunk and lower limb) but is not functional enough for standing transfer.
This information tells us that:
- The muscle atrophy on his right buttock would lower the right IT when sitting
- With the pelvis lower on the right, the lower spine will correspondingly be tilted to the right,
- To gain horizontal gaze, the client attempts to level their shoulders
- The combination of these preceding factors led to a scoliosis, convex to the right
- In this case this also led to the pelvis migrating to the left, further exaggerating the postural asymmetry.
3. Compare the findings in supine and sitting assessments to establish a desired posture through the simulation task, starting from the pelvis.
In the case study example, the simulation task demonstrated that:
- A gentle build up supporting the right buttock has compensated the lack of muscular bulk and reduced his pelvic obliquity and thoracic scoliosis
- Lumbar support further eliminated his posterior tilt and erected his trunk symmetrically
- Seating goals were discussed with the client and the following seating plan was agreed:
- Assess cushions with capacity to accommodate asymmetrical shape and provide adequate pressure care
- Trial tension adjustable backrest upholstery and a rigid backrest to support his upright posture without compromising balance and function
- The client would look for his lost rigid side guard to centre his pelvis
Skin checks
A skin check is indicated if there is a history of skin breakdown. Many sitting-acquired pressure injuries develop against seating support surfaces such as the cushion and back support. A skin check for redness or evidence of skin damage is conducted in supine or side lying position to assess these sites.
The goals of assessing the skin
- To determine the location and shape of any reported scar tissue or wound
- To check for other scars or skin marking
- To establish if skin breakdown is due to pressure from a particular bony prominence against the support surface.
Example:
While the client is lying in supine or side lying position, simulate the sitting posture by flexing the hips and knees according to the client's postural assessment in the wheelchair. Gently palpate the scar or skin problem areas to see if they correlate with a bony prominence such as the ischial tuberosity (IT), sacrum, greater trochanter (GT), or coccyx.
Common presentations and possible causes due to support surfaces
- Pressure injuries on or near the gluteal fold: If the pelvis is posteriorly tilted, the ITs are projected forwards. If the seat cushion has an ischial well check for contact between the ITs and the front of the well. Ensure that the client has good upper limb strength and good skills for self-lift or slide board transfer
- Sacrum and Coccyx: With excessive posterior pelvic tilt, there is more upper body weight distributed through the sacrum or coccyx against the support surface, typically the cushion and mattress. With excessive posterior pelvic tilt, the coccyx projects more and may be subject to greater loading. The commode seat should also be reviewed. Also check also for the clearance against the push wheel of the manual wheelchair during self-lift or sliding board transfers
- Underside of the GTs: check commode seat and cushions with an ischial well that distribute more load to the GTs.
- Lateral side of GT: check side lying in bed, and check if GTs are pressing hard against armrest poles or lateral pads
- Heels: check bed, heel loops on footplates, heel scrapes by front castor wheels
- Lateral border of the foot: external hip rotation, planter flexion and foot inversion may lead to localised pressure or friction on the lateral border of the foot against footplates. Check foot position to allow clearance from flip up hinge of the footplates in wheelchair and commode
- Consider the shape of any scars or wounds. If the wound is elongated when compared to the shape of the bony prominence, there is a possibility of shear component contributing to the injury.
See Pressure Management in Module 8 for more details.
Key concepts in this module
- As physical abilities that control posture, joint movement and balance are reduced after a spinal cord injury, a thorough manual assessment is essential in the seating and wheeled mobility prescription
- Knowledge of functional abilities and application at the level of the spinal cord injury will determine the appropriate seating assessment process and techniques
- Through the MAT process, the clinician can outline the postural control required to prevent deformities and provide adequate support for balance and function. This process assists clinicians to work towards 'shaping' the seating system to fit the client's body shape
- A history of pressure injuries and skin breakdown must be thoroughly reviewed in relation to the influences of posture on pressure distribution and wound location, so that they can be considered in seating interventions
- Practice makes perfect: gain skill by practising hands-on assessments on colleagues or on clients, with peer support, and
- Make a decision to practice hands-on assessment regularly. A consistent seating assessment process improves the clinician's skill level and provides quality seating prescriptions and outcomes.
Quiz for Module 3
Name the key bony structures and prominences shown:
Define the following terms:
- Scoliosis
- Kyphosis
- Pelvic obliquity
- Posterior pelvic tilt
- Anterior pelvic tilt
- Pelvic rotation
- Hands-dependent sitter
- Hands-free sitter
- Dependant /propped sitter
Answer the following:
- What are the three assessment phases of a MAT?
- What should be included in recording a MAT?
- How might shortened hamstring muscles affect a person's posture?
- What is the purpose of a skin check and when should it be carried out?
Printed: Jul 30, 2024 1:13 am